
My mom does lots of animation, and one day mentioned that she would love to have an animation stand, but professional ones are either cheap and too small, or very expensive. With the holidays coming up, this seemed like a good present!
I Googled “animation stand” first, to see what others have done and get some inspiration.
A simple enough design I saw a few times is one where the camera holding bar is held by one side:
Of course, there’s going to be a lot of torque around where the that bar attaches to the two vertical bars, which is why (in the ones above) they have those “sleeves” that go around them. That wouldn’t be too bad to make with some steel tubing, but my friends and I sold our welder when I moved about a year ago. One nice aspect of this design is that you can make the height adjustable if there are holes in the sleeve and up the length of the vertical bar.
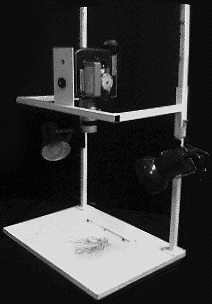
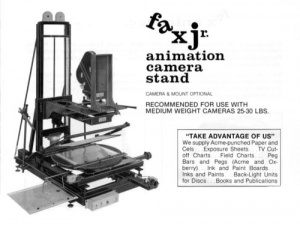
Another very popular DIY design was what I call the “cage” design, usually made out of slotted angle steel, like so:
This was kind of appealing because of just how easy it would be to do: I could probably get everything I need from a single Home Depot trip (and cheaply: 8 feet for 30 bucks!). However, it…doesn’t look very nice, in my opinion. Additionally, the front part of the cage (closest to the animator) has to be high enough that you won’t hit your head, and it’s structurally not necessary.
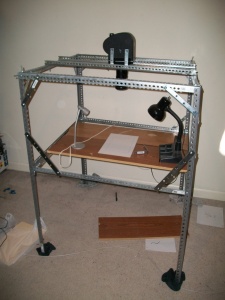
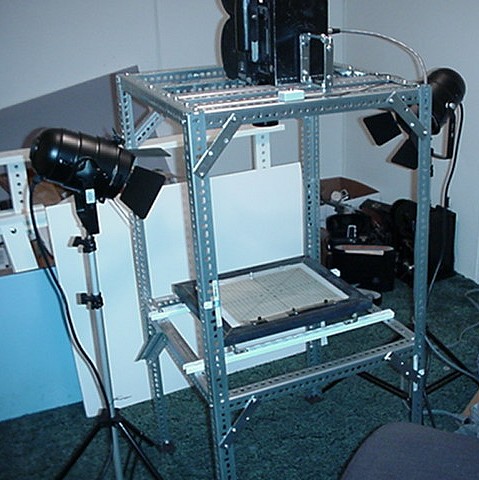
In the more professional realm, you see some really cool ones:
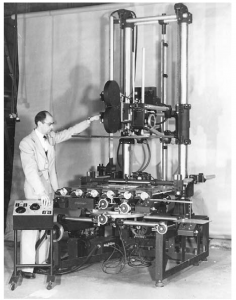
…maybe someday.
If you could make a sturdy enough arm, this could be really handy, letting you change height and pan, and put it away if you want:
However, it would almost certainly introduce wiggles and jiggles noticeable to a heavy camera attached to the end of a long lever arm.
I actually found this site after finding the above pictures on Google images, which goes over many DIY and commercial options in more detail.
My mom wants to use her DSLR, meaning it would weigh a few pounds. This ruled out something like that first design (if I didn’t want to use some pretty hefty materials), because of the torque there would be around where the bar attaches to the verticals, and would probably give rise to it being kind of shaky.
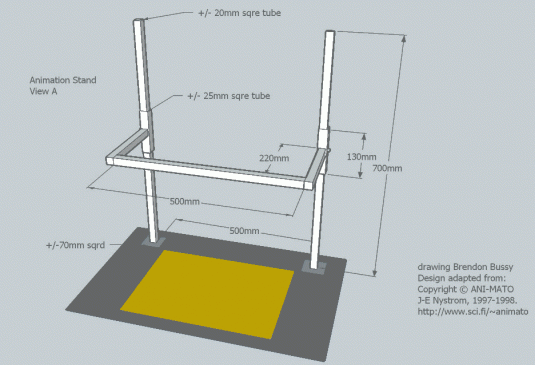
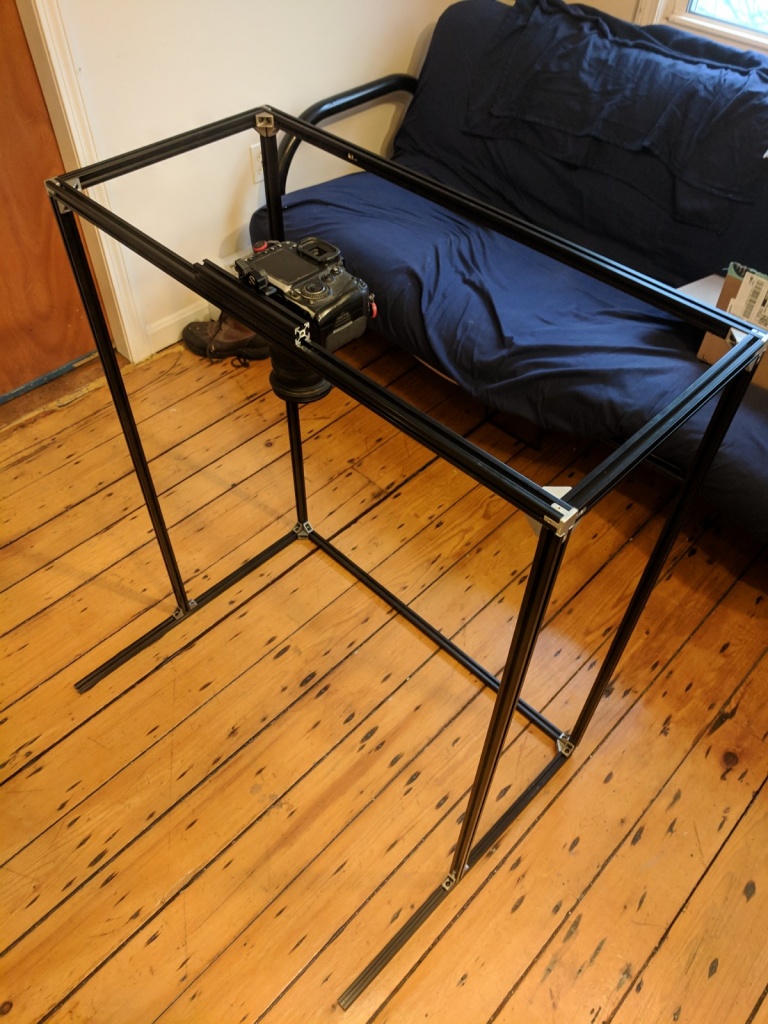
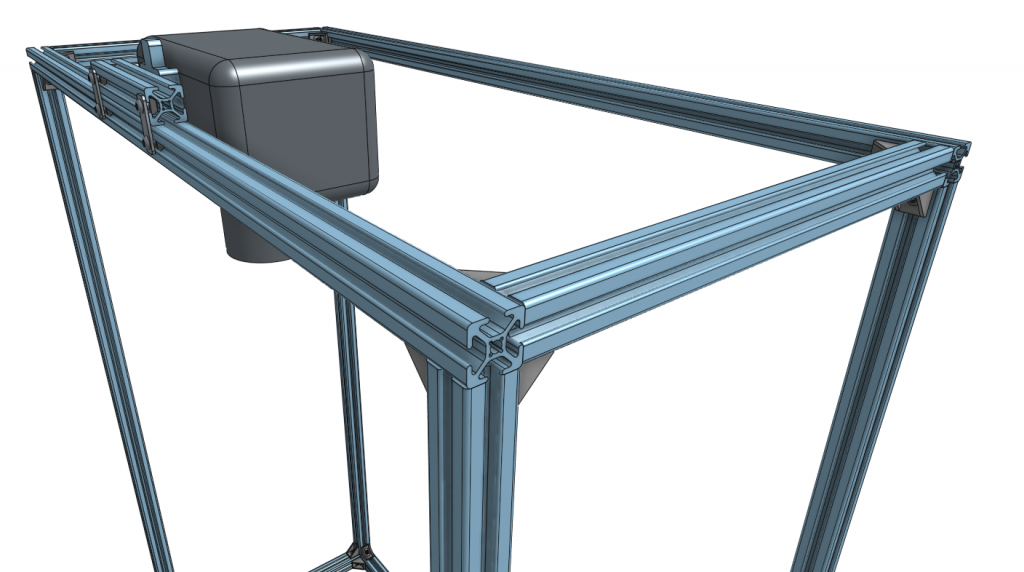
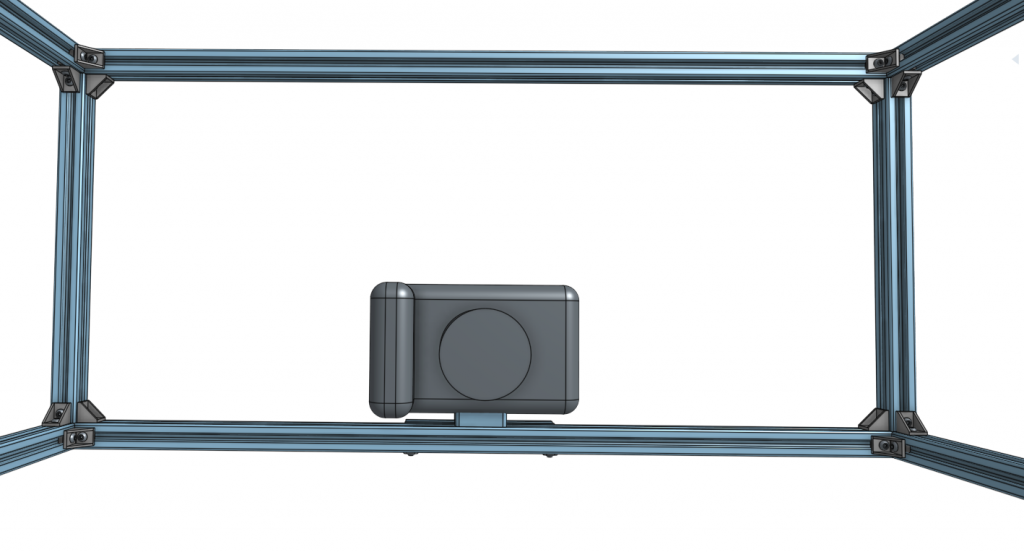
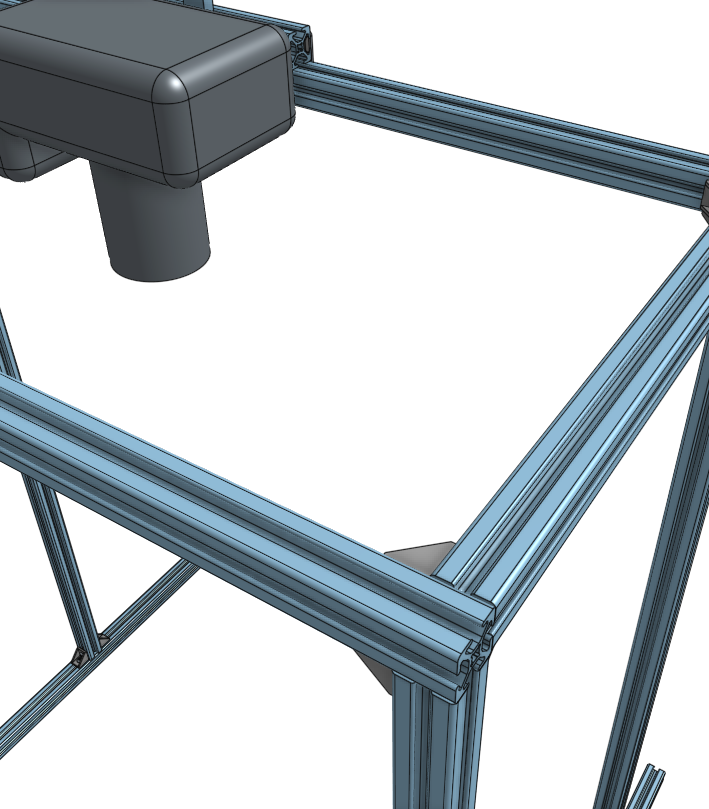
I also wanted to have it be pretty disassemble-able, because she’s moving soon and I didn’t want to create something really unwieldy. So, I decided to go for something like the cage, but without the front most bar on top, made of aluminum extrusion:
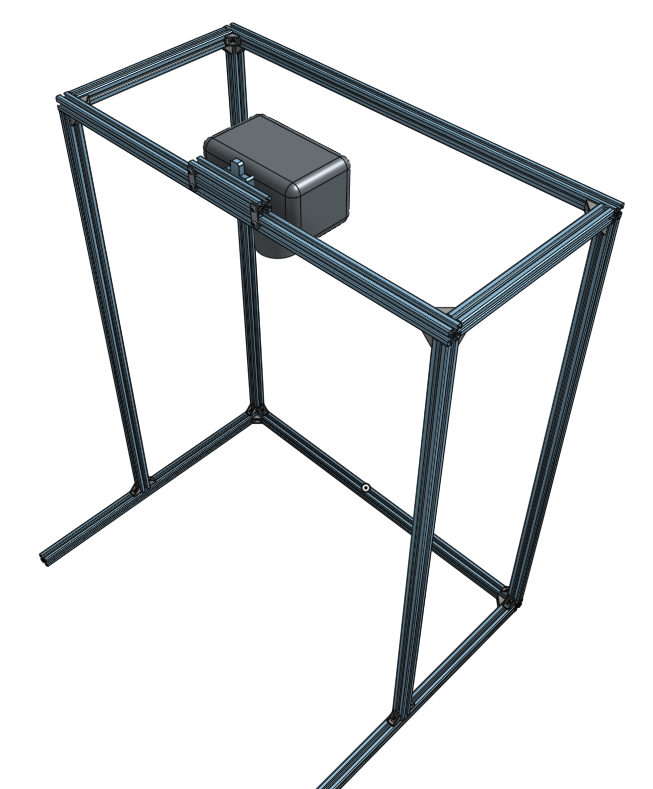
I had never used extrusion before, but I love the look of it and it looked really fun. Erector sets for adults!
The modeling was done in Onshape, which is a piece of free, cloud based CAD software. I think I probably could have done it in a fraction of the time if I just sketched it by hand, but I thought it would be cool to do a project from start to finish by designing everything carefully, ordering parts, and then assembling it at the very end. You know… “properly”. Onshape is also a good tool for designing stuff for 3D printing, so I thought it would be good to learn it for that.
As it happens, it was actually pretty useful to be able to see what it would look like as I designed it, so it wasn’t just overkill.
And now for the build!
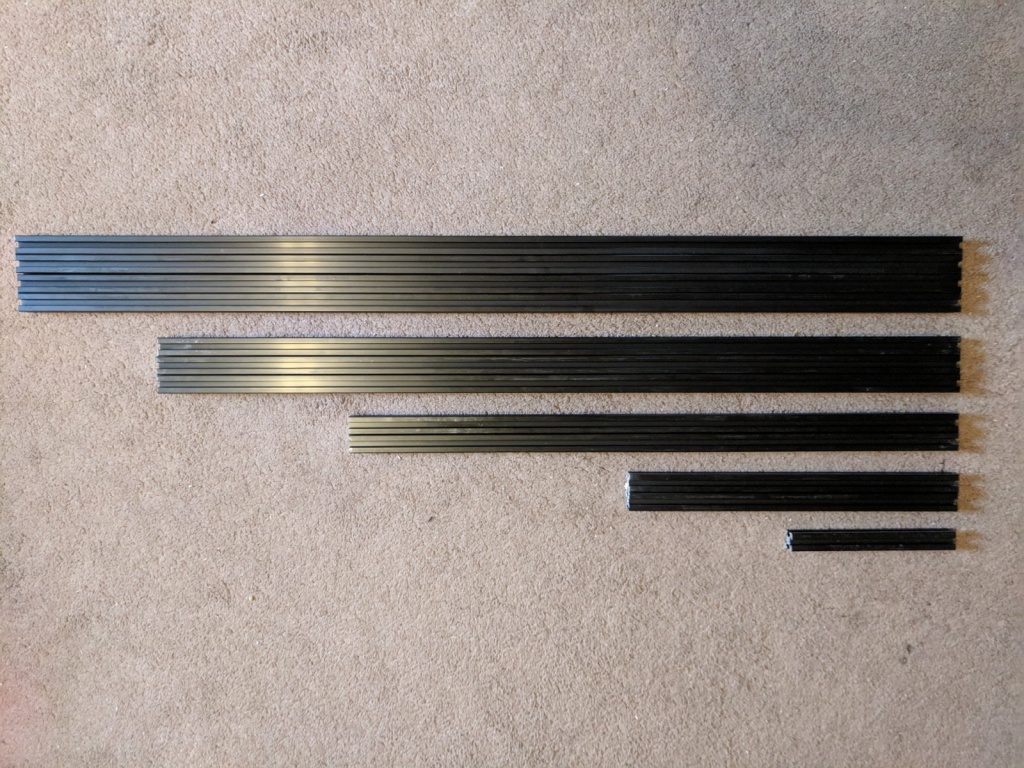
I don’t have a chop saw or miter box anymore, so to cut the extrusion to size, I just carefully measured, clamped a little bar to prevent me from messing up, and used a hacksaw. The cuts were mostly good, but a few were a little off, so…
belt sander to the rescue!
Ahh, I’d kill for a real workshop again, rather than an assortment of hand tools and a basement. But it’ll do for now!
After the belt sander, I used a set of mini files to clean up the edges.
All ready to go:
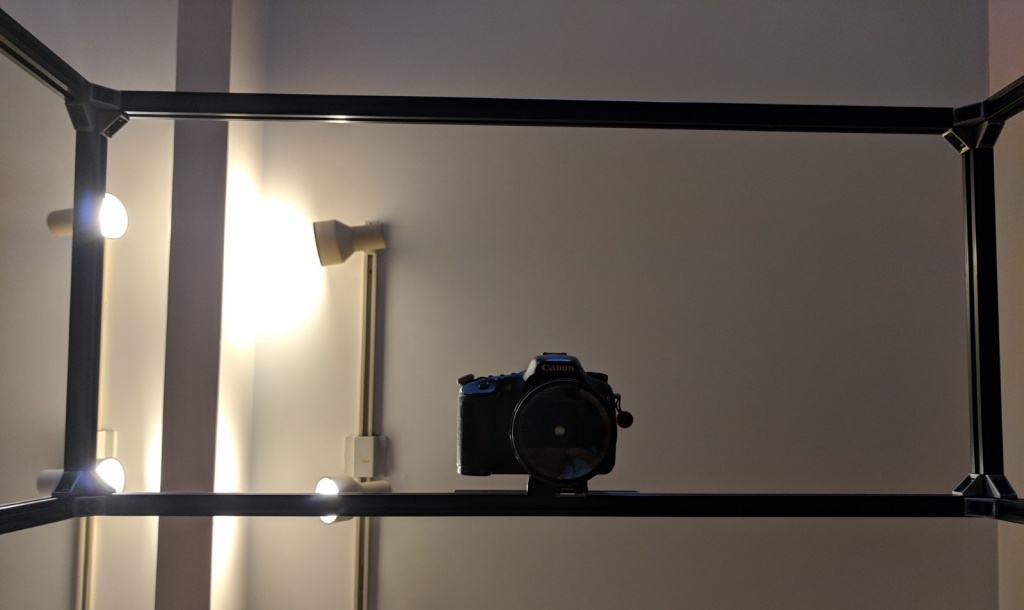
So, how’d it turn out? Let’s see some side-by-sides.
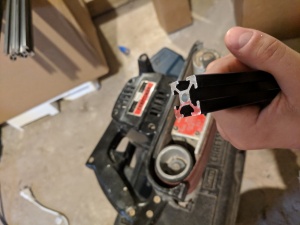
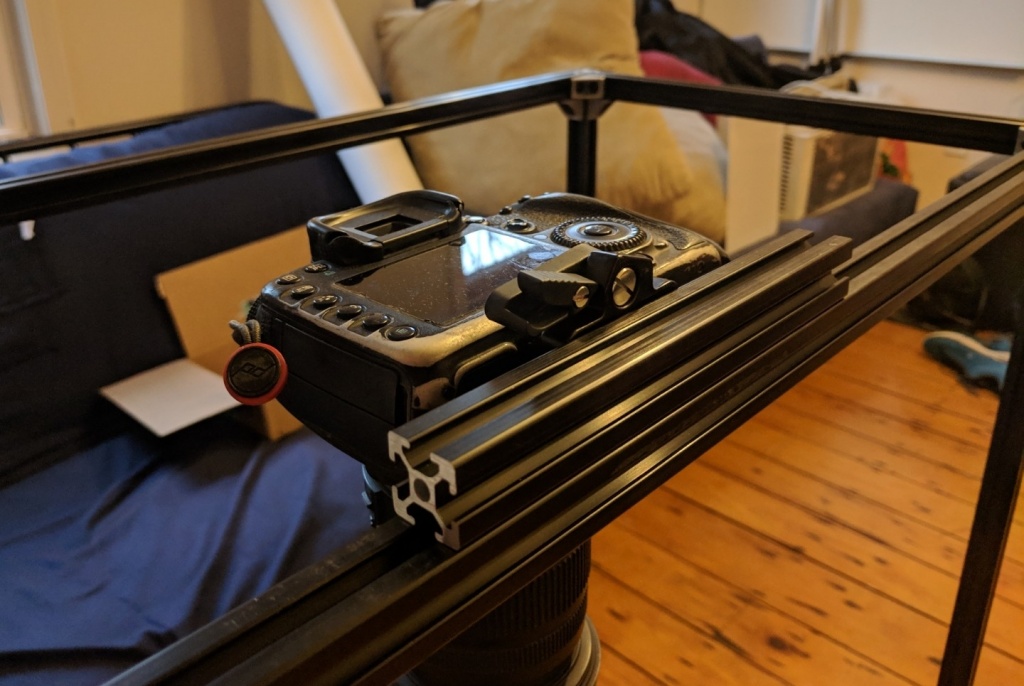
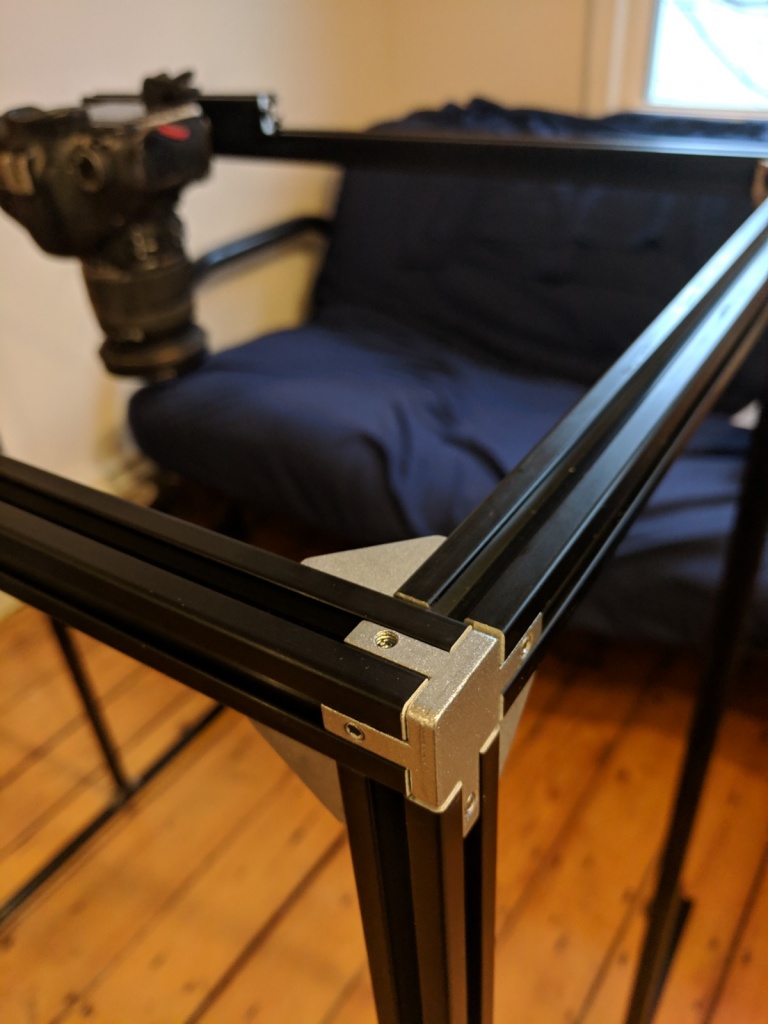
The camera mount:
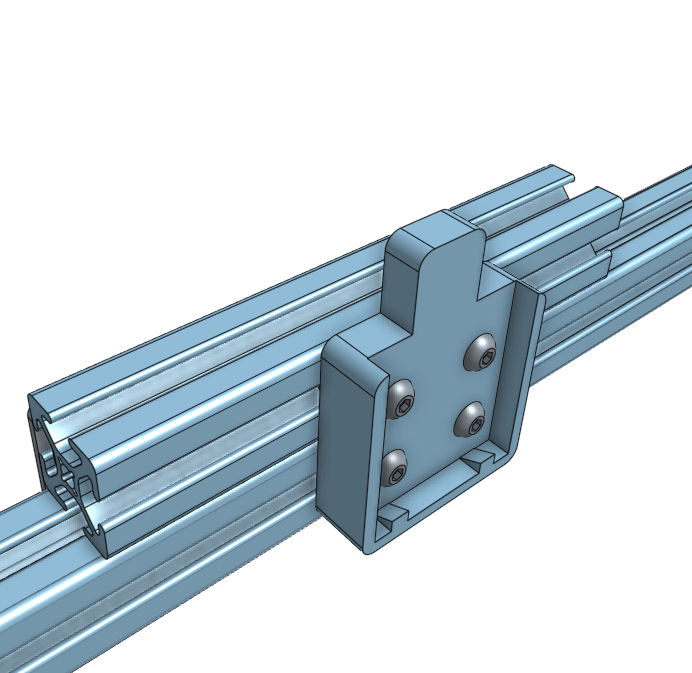
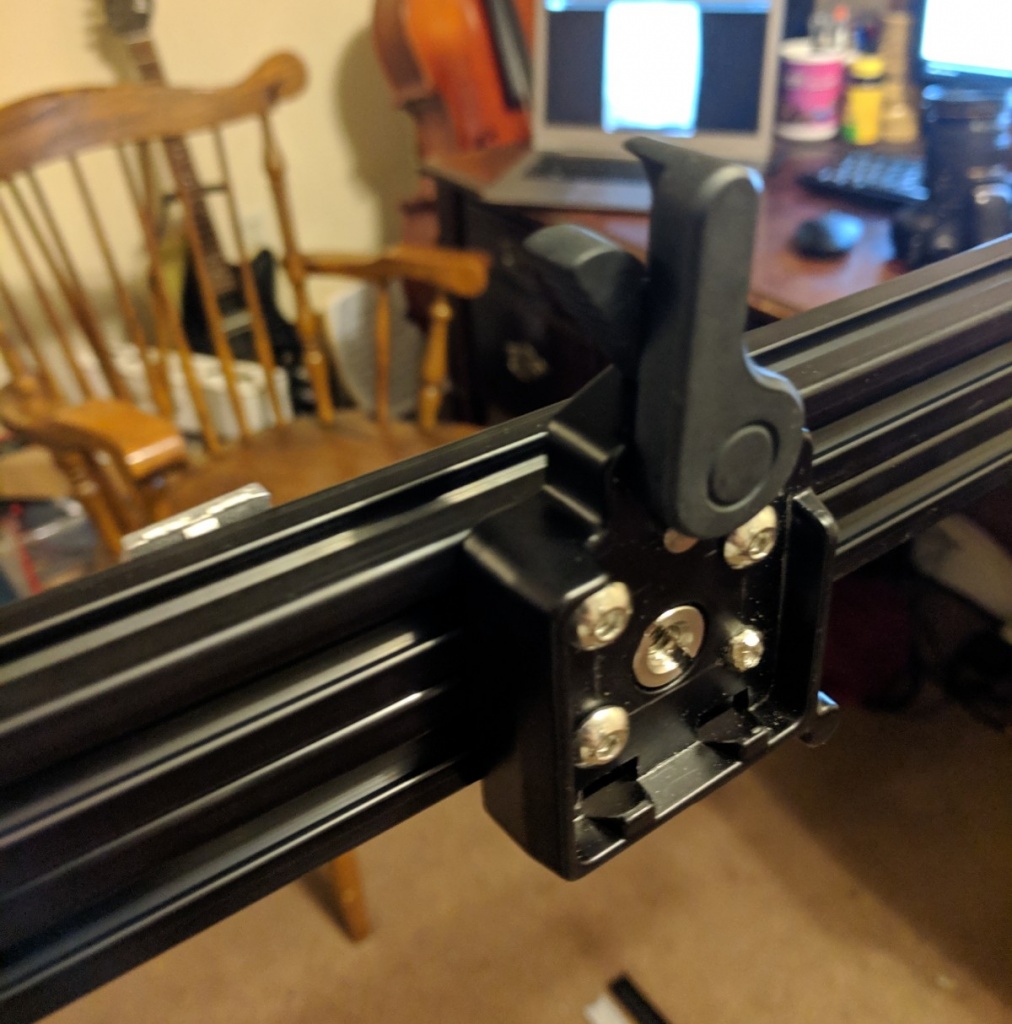
I’m pretty proud of how this part worked out! DSLRs typically have a 1/4″ 20 threading on their bottoms, so I knew it couldn’t be too hard to attach, but I wanted something that ideally could easily be removed in case she needed to use the camera for something else or whatever. So I bought this mount which had enough space under where the camera-side mount attaches to have some button head screws. I drilled 4 holes, with the top and bottom row separated by 20 mm, to attach to t-slot nuts in the extrusion. It’s veryyy sturdy with my monster Canon 7D, which has a magnesium alloy body, and is definitely heavier than her camera.
I also modeled the camera mount from scratch, which was totally unnecessary, but a good way to learn about making arbitrary shapes and extruding.
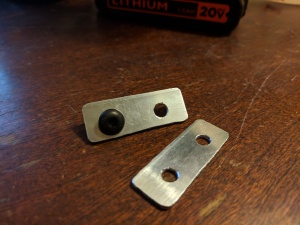
You may notice that those little tabs are in the rendering but not in the photo. I hadn’t made them by the time I assembled this, because I hadn’t decided how I’d do it yet. I figured I’d probably need some better counter leverage on the other side of the camera, but to be honest, it was really solid and I probably didn’t.
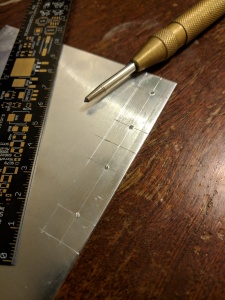
It was actually kind of hard to find what these tabs are called by searching (“aluminum extrusion tabs” will get you lots of Google results that aren’t these), but when found them, they were like 10 bucks for 5 of them. Screw that! This whole aluminum plate was like $3, so I just made them.
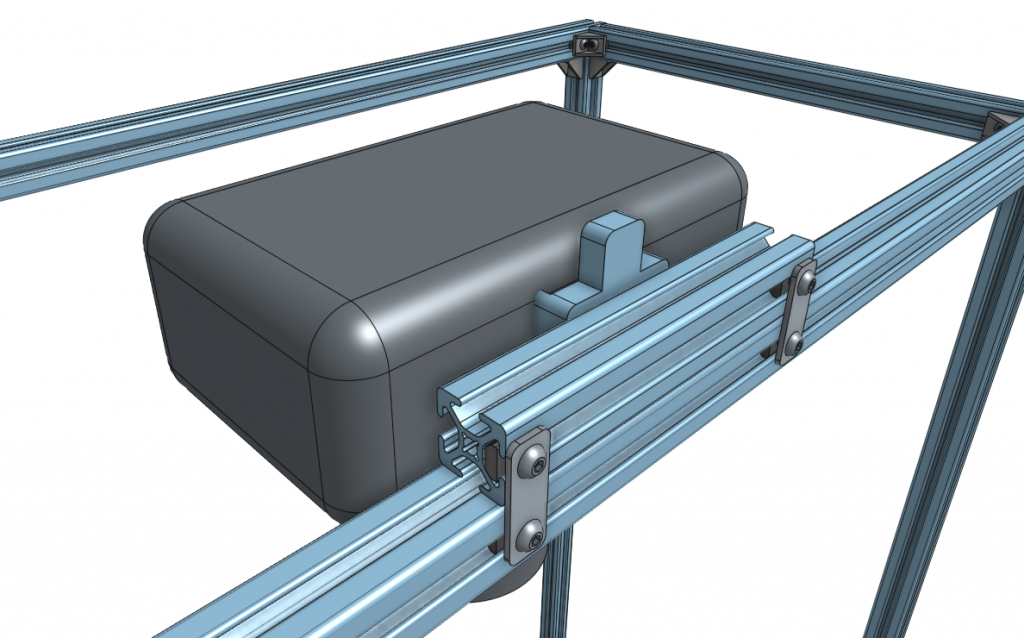
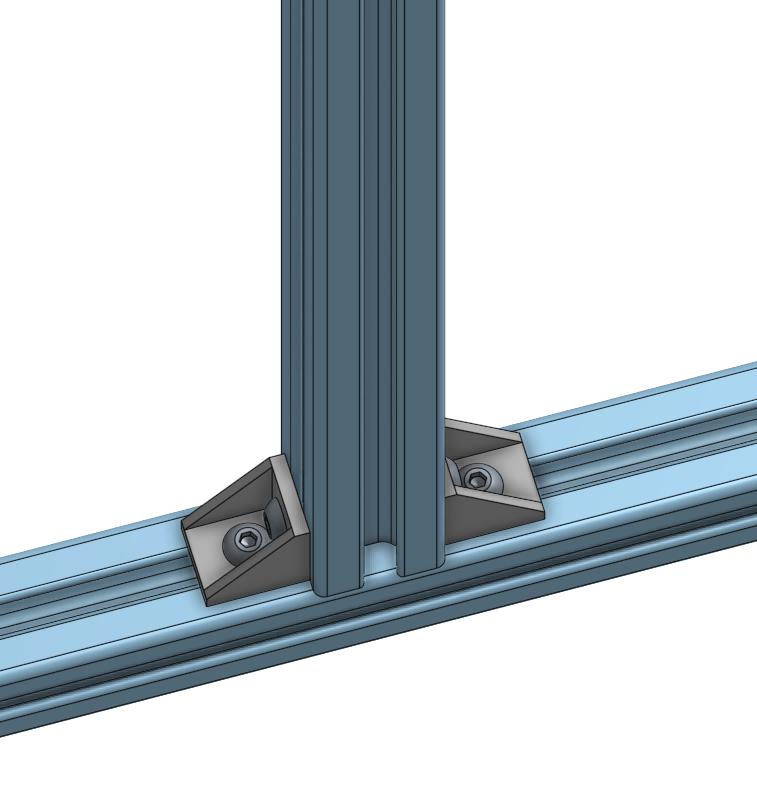
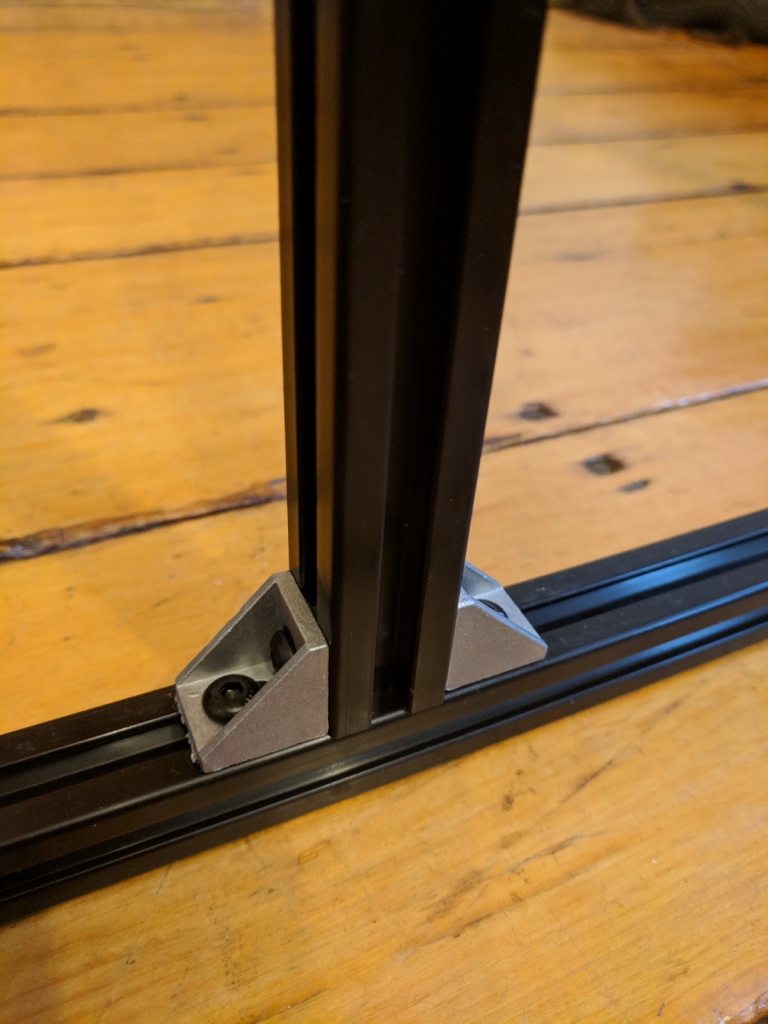
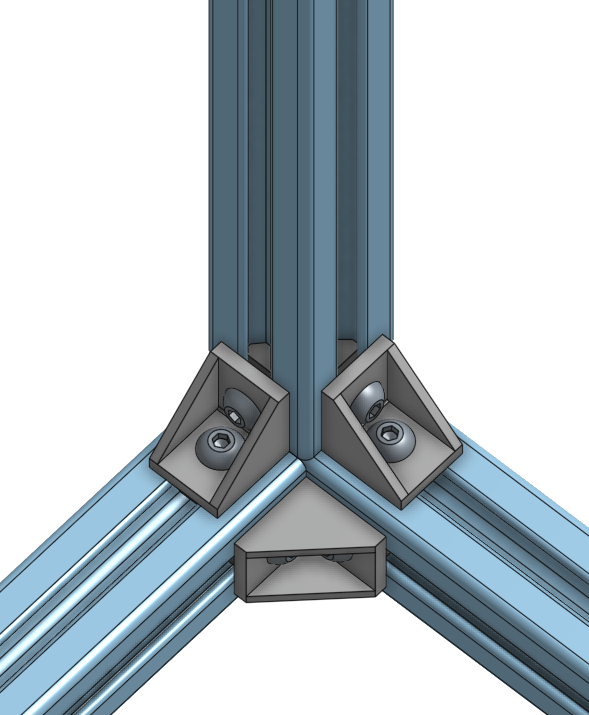
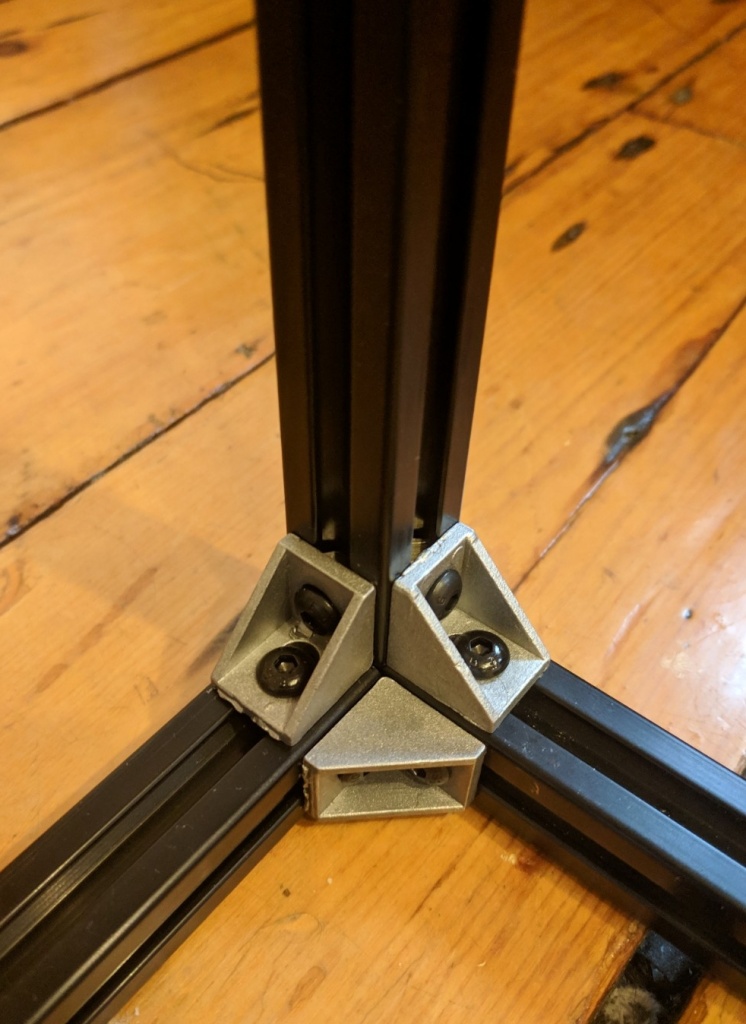
Another little difference between the CAD and real thing is that I found these corner mounts I wanted to use for the camera bar connection because they’re really solid and give it a nice, flush look:

A few other gratuitous design/reality shots:
Lastly, there was one little hurdle… in my mom’s original sketch, she wanted the height to be about 42″. I designed it to have about this height, but I had an intuitive guess (from my amateur photography) that the focal length was something I’d have to deal with. More specifically, many lenses will automatically zoom in (i.e., lens getting longer) due to gravity if they’re just hanging down. Many also have a lock, but in my experience they usually lock in the totally zoomed out position. So I knew that probably neither of those extremes would get the bottom plane in frame perfectly at the height it is. Indeed, when I set it up with my 7D and Sigma 17-50mm lens, it has to be at about 28mm to have the area at the bottom be the field of view.
Sooooo…
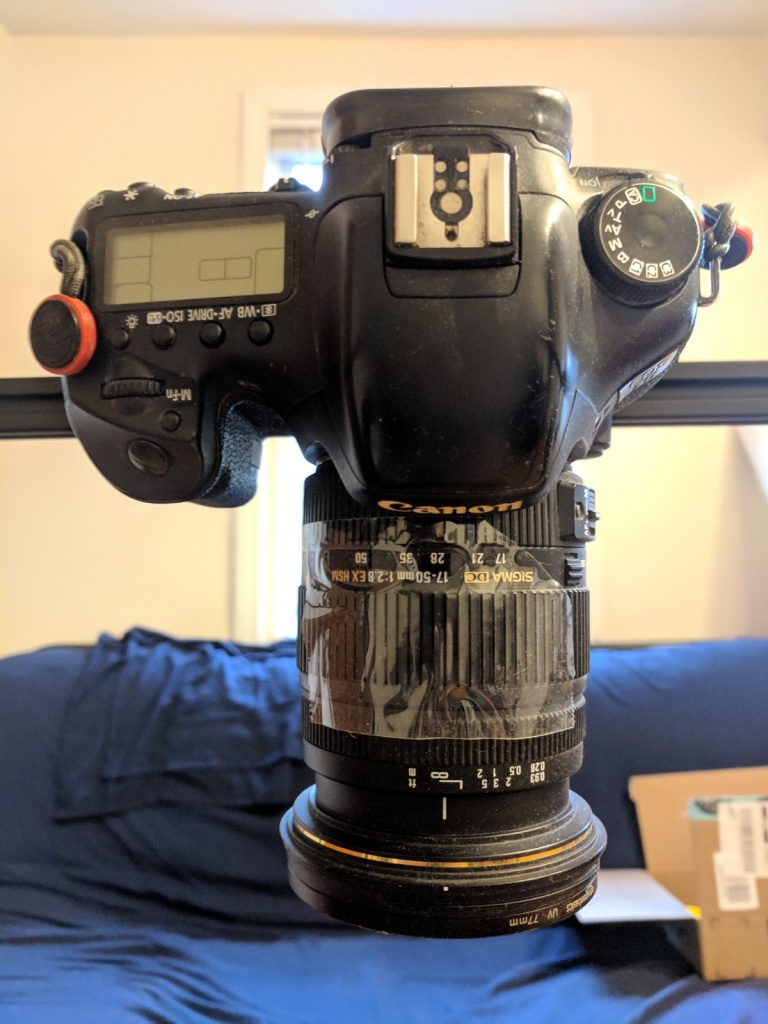
real stopgap obviously, but it will work fine in a pinch. If she has to use the camera for something else, it’s just a single piece of tape to take off. Alternatively, Canon makes a pretty cheap, very decent 28mm prime lens. Maybe I could even 3D print a removable attachment to go around the lens and fix it at one focal length…
Anyway, that’s all for now! It was lots of fun to design something from scratch, and extrusion is real fun to play with. I’ll definitely be using it for future projects if I want to make something nicer. I’d say I have a pretty solid foundation for Onshape now, and I’ll definitely be using it again in the future. If you want to check out the design, since everything is open with a free account, the link is right here.