
I’ve done several little projects previously about recreating art I saw at MASS MoCA, but they were Sol LeWitt pieces. His definitely stood out to me the most, but some other ones really caught my eye too.
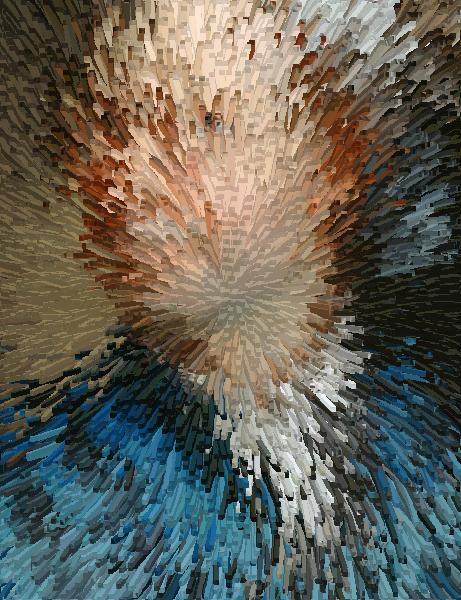
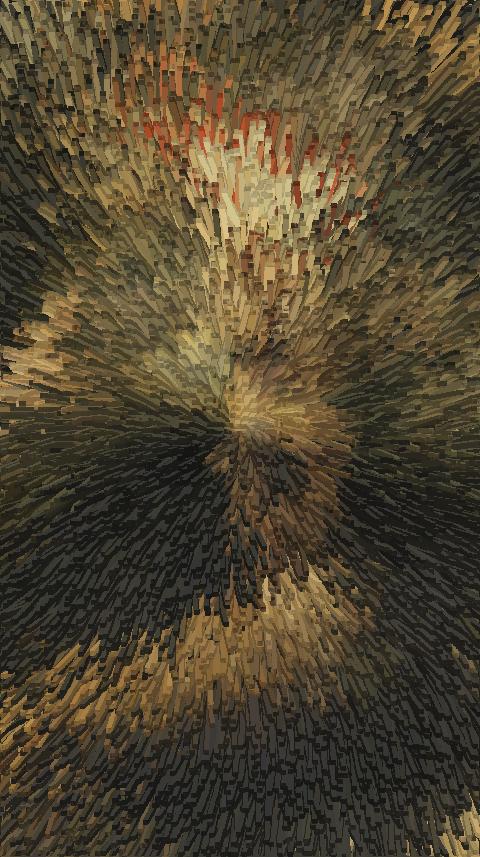
One of them was the artist Dawn DeDeaux’s “The Vanquished Series: G-Force #1 and #2”. Here are a few pics I took:
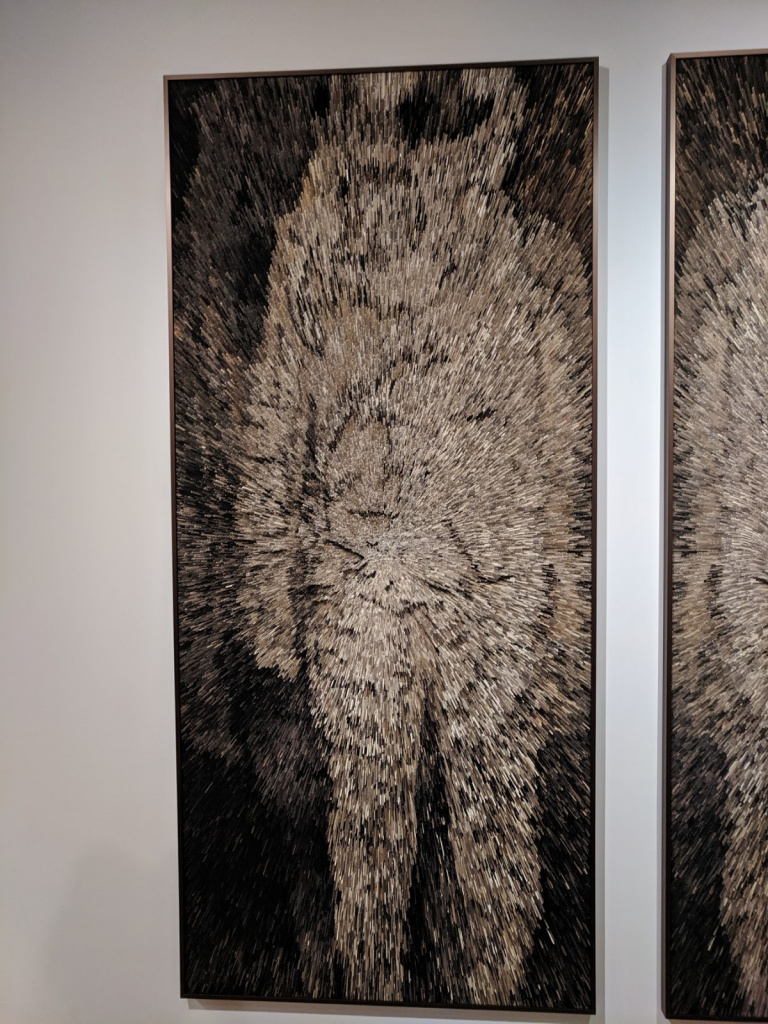
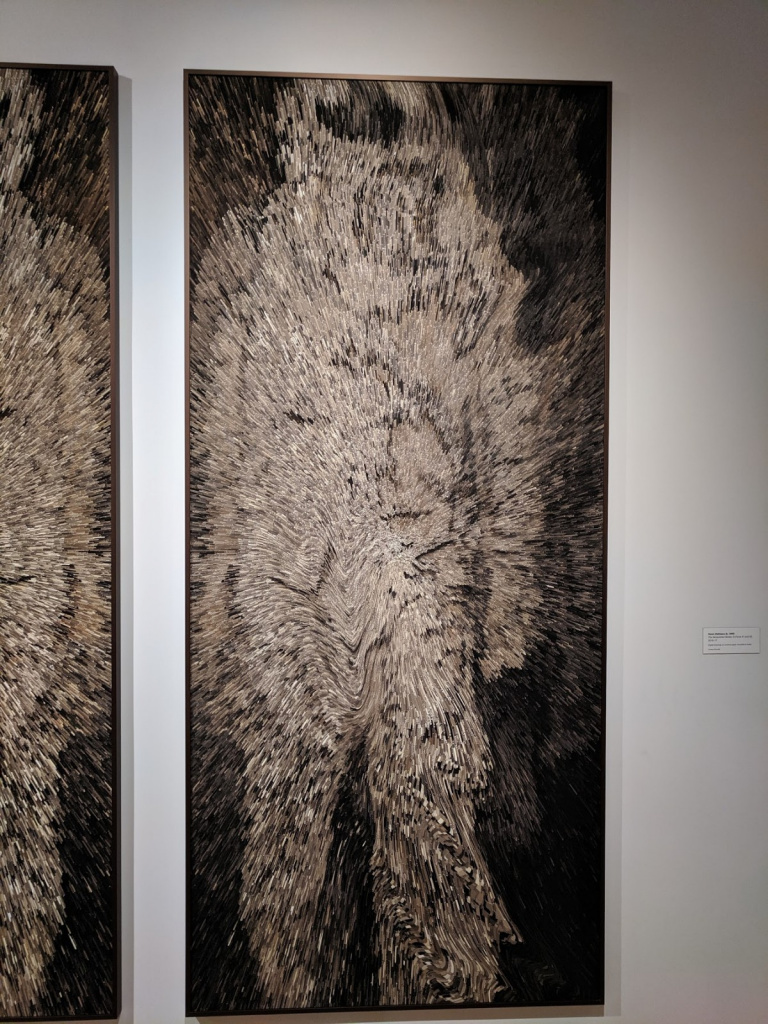
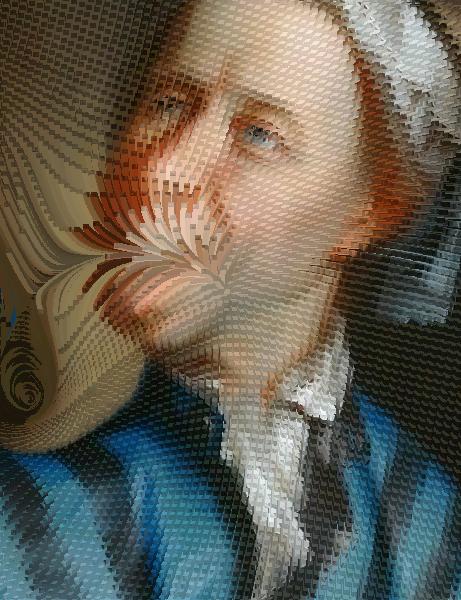
As I recall, she had some other work there, but there were only a pair of these. I like them a lot. At a glance, you can see that they’re both figures, that have had some process done to them that gave them this recognizable yet pretty unearthly and alienating look. I knew I had to try making these! I’m curious how she did this. Is she also a python-er?
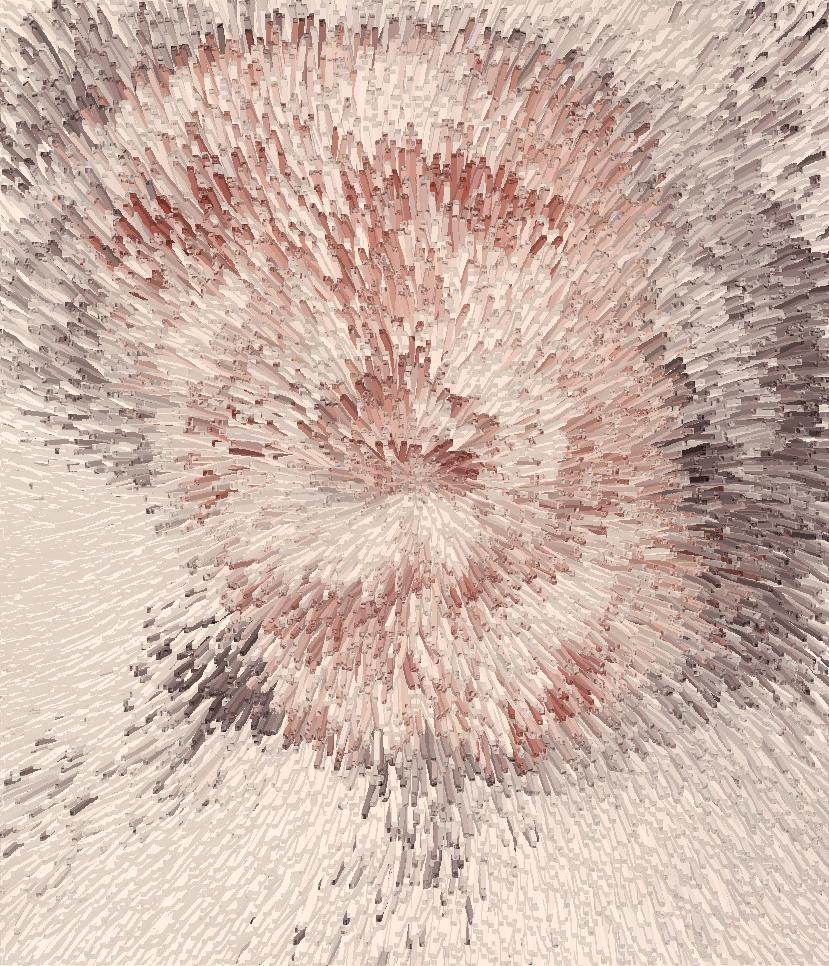
Let’s look at a few close-ups I took:
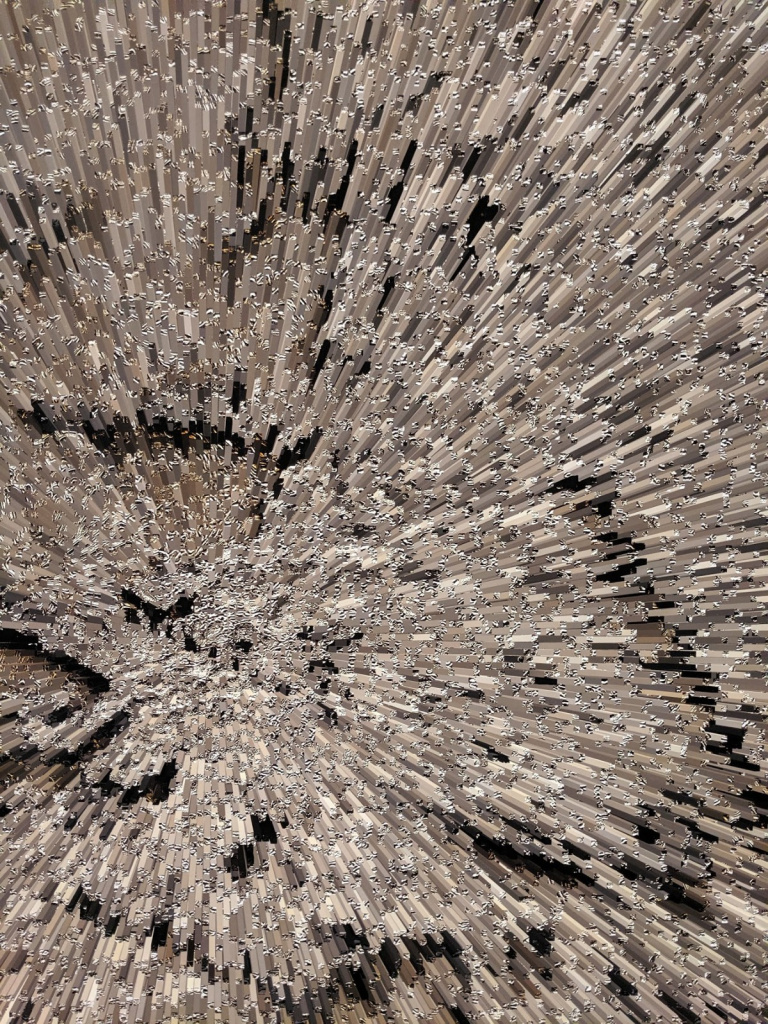
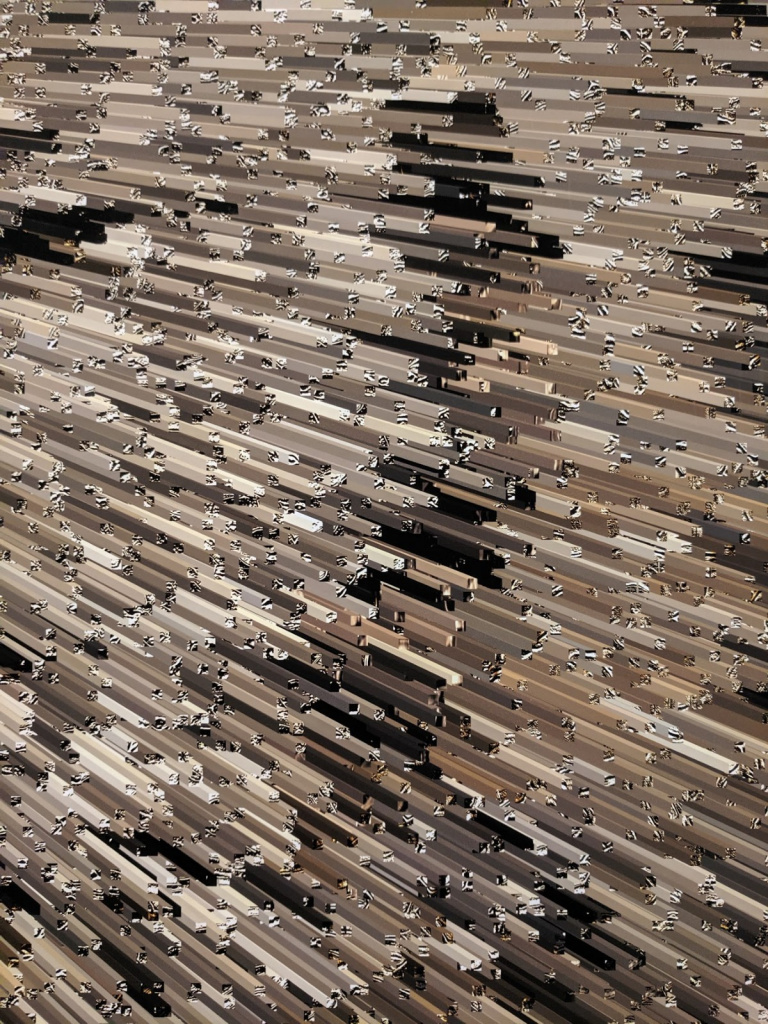
So we can see the main idea pretty easily: they were pixelated into little equal sized squares, and then smeared/exploded, such that they left trails behind them. The trails are different colors, so I took a guess that the trail color of each square was probably the mean color (however you define that, since color spaces are weird).
Here’s the progression of what I did! I just used Pillow (PIL) and numpy basically. The main idea is this: import the image with PIL, convert to a numpy array, calculate a bunch of PixelBlock namedtuples:
PixelBlock = namedtuple('PixelBlock', ['pixels', 'avg_color', 'block_corner', 'x', 'y', 'w', 'h', 'block_center_rel'])
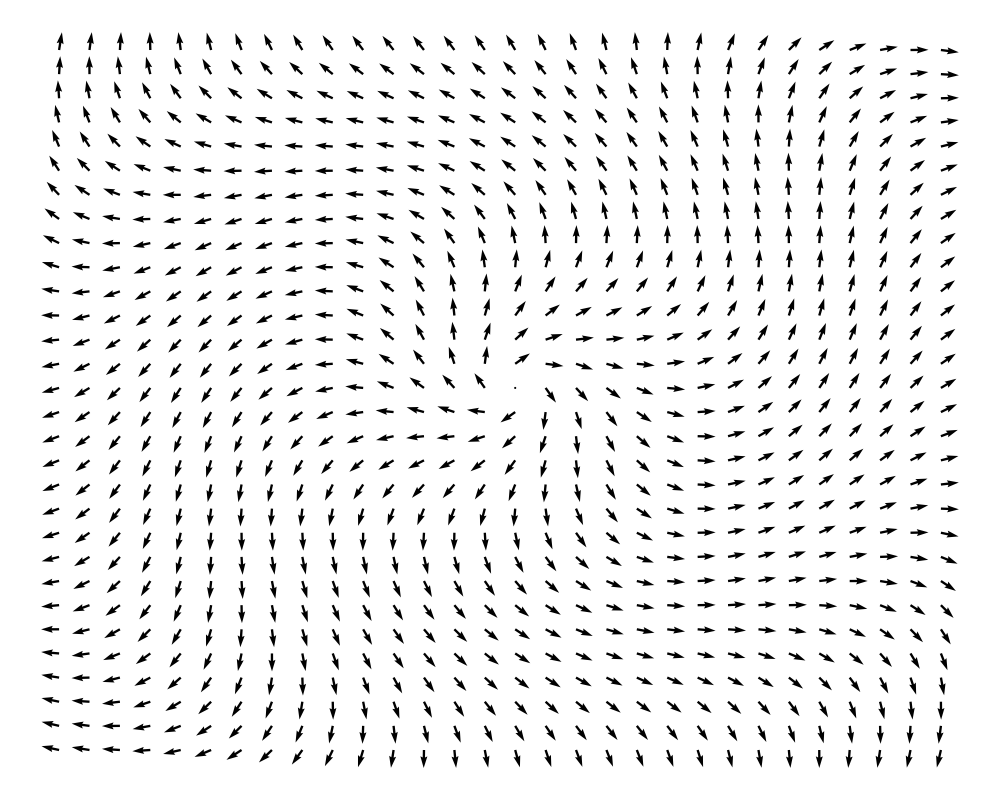
Then, for each PixelBlock, plug its location (relative to the center of the image) into a vector field that will determine where it gets sent to. This gives the “final” location of that block. Then, chop that path up into many steps and overwrite the pixels of the image’s numpy array with the constant mean color for that block. Finally, overwrite the pixels of the final location with the pixels of the original PixelBlock. There are a bunch of details, a few of which I’ll mention but most of which I won’t.
Note that with this method, since you’re necessary overwriting pixels/have some on top of others, you have to do them in a certain order: outside in. To do this, I just sort them by the norm of each PixelBlock‘s block_center_rel attribute (i.e., the coordinates of that PixelBlock‘s center, relative to the center of the image).
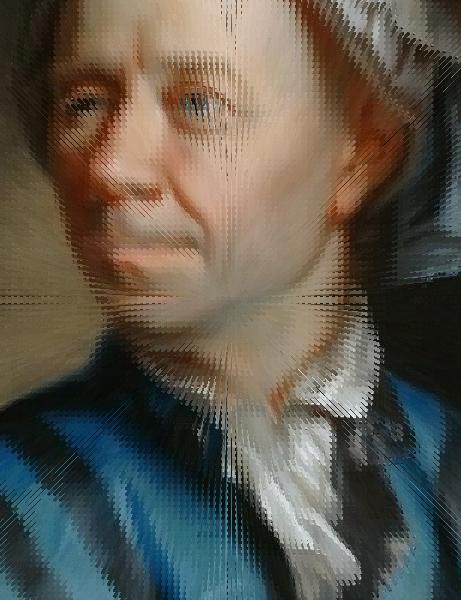
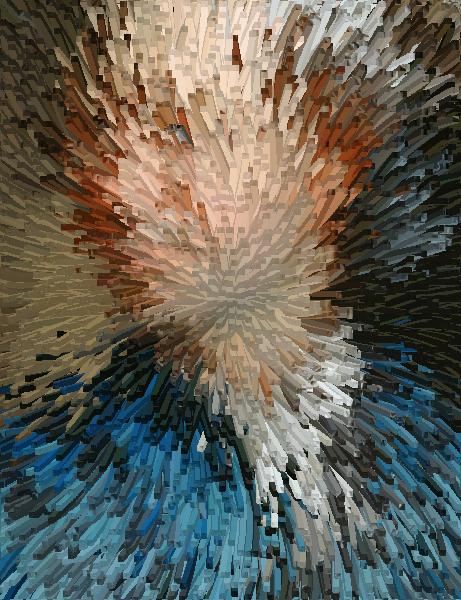
I think we get pretty far with this off the bat! Here’s an example of mangling dear Euler, along with its corresponding translation per PixelBlock:


And one with much finer blocks:
However, it’s still missing a lot. One is that here I just used a translation vector field of the form  , which is just sending “spreading” all the blocks out uniformly. Clearly, way more is going on in the originals. To fix this, I just added a “jitter” term to each, a
 np.random.randn(2). That definitely improves it a bunch:


Definitely getting closer. Next, I took a closer look at one of my bigger block sized images and compared it to the close up of the original (check them out above). Notice anything different? Yep, the trails in her image actually aren’t one color, they’re two! The mean color seems like a decent guess for one of them, but the pair seems to always be one color plus a lighter version of it. Additionally, the lighter side is always in one direction, like below, on the top side:
Also an easy change:
It has the effect of adding a sense of depth, because now it looks like something 3D that was lit directionally.
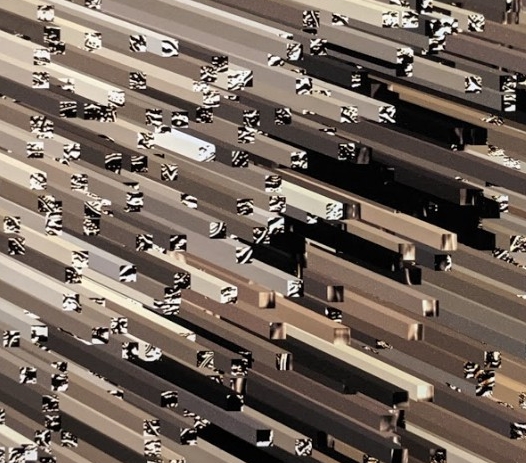
Anyway, it’s pretty good at this point, but not quite there. One big reason is that if you go back to the originals, you can see that they’re not just randomly jittered straight lines, they definitely have curvature, sometimes pretty strongly:
This meant changing the method slightly, since before I was just relying on the final destination of the block. Now I had to define a vector field, and step through the path of the block as it travels through it. At this point it becomes a little more… art than science, as they say. To get some quick easy curvature, I just apply a rotation matrix at each point:

but, make it so the angle of rotation  itself, is a periodic function of the distance from the center of image:
Which gives a vector field of the form:
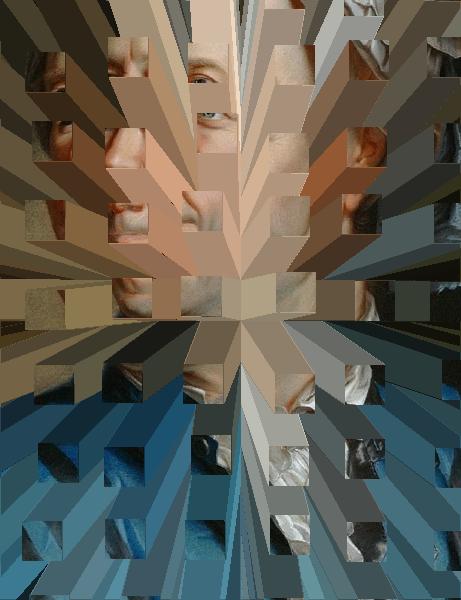
Applied to the image, we get:
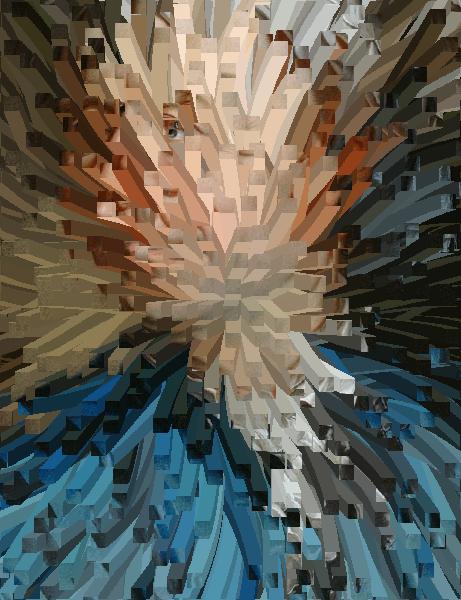
Definitely getting that weird look!
There’s one last major mod. If you check the original again, you can see parts with really high curvature. There are probably lots of ways to do this, but I decided to just add little “whorls” randomly. By a whorl, I basically mean the same type of rotation field as applied to the whole thing, but applied to a local region and made to drop with distance much faster.
Like I said, at this point, there’s some art to choosing the parameters that determine the strength of the effect, how fast it falls off, etc. If you mess them up, you quickly get some Cronenberg-esque monstrosities:
This hellbeast is actually the result of using a whorl as described above. Because a rotation field just looks like spinning around the origin, it causes the “outgoing” original field from the center to “collide” with the whorl’s field going in the opposite direction, giving rise to that diverging horror area near his…no, its mouth. To make this less awful, I made it so it rotates around the whorl in opposite directions, depending on which side the point is on the whorl, like a stream going around a rock.
Lastly, you might have noticed in the last one, the demon Euler, the blocks were someone grid-like away from the whorl. This is because while the simple original single vector method above can be jittered by just adding a small random vector to each block’s path, now the path is formed of many vectors. Therefore, to get that same randomness, we multiply each block’s path by a small rotation matrix after the path has been calculated.
Finally, all together, here are a few outputs:
There are actually still a few little details I have to get down, but I think I’ll stop here. The code repo for this is here. See ya next time!
2 comments
cool project! would that be saturn devouring his son by goya?
Hey Jules, you guessed it! and thanks!